I was requested the other day for a custom job within OBIEE. The request was for an extra “Go” button which would be placed on top of a vertical dashboard prompt. The reason being was that the vertical dashboard prompt was long enough in which it warranted everyone to scroll down in order to press the “Go” button ( which comes implicitly with dashboard prompts at the end of each dashboard prompt.) Since this involved extra work for the users (scrolling), they would like it also at the top of each prompt.
Easy enough, I said fine no problem. This should be easy, just look at the page’s source code and copy the HTML code along with the call to the javascript function and create it via the “Text” dashboard object.
Easier said then done. The javascript call needed table id’s which are not static, but dynamic for each rendering of the page. So I went out searching for the source code or template used for the dashboard pages which generates this so that I could mimic and add what I needed. Not that simple. I then came across a solution, something similar in which I could use to modify for my needs. This was from a Mr. Sunil Ranka via his blog here: http://sranka.wordpress.com/2008/11/09/how-to-replace-multi-go-button-prompt-by-one/
I used the last two scripts along with the globalFilterPrompt.js changes. The other changes I did not need, since they are for hiding the dashboard prompt(s) implicit “Go” buttons and I still wanted to show ours. Now it seems easy, but had problems which took me a while to figure out. By copy and pasting from his web blog the code snippets will come over with special chars which will result in erratic behavior or errors on page. So I just needed to remove them which I did so by manually typing the code. Now I did this so that I could read and understand what he was doing instead of just copy and pasting and not fully understanding what was being done. Below I have the two code changes with the results. I used the sampleSales RPD as my testing ground so the vertical dashboard prompts are not what I am truly using it for. The target environment has only 1 dashboard prompt, aligned vertically with over a dozen multi-selects and/or drop downs which renders and takes over a page. The new “Go” which I created is a global submit button, in that it takes all dashboard prompts filter entries and submits them. The original implicit ones takes only those entries that belong to it dashboard prompt. Hope that makes sense!
Well first thing was to use the new function for the globalfilterprompt.js. This javascript file is in two locations: \OracleBI\oc4j_bi\j2ee\home\applications\analytics\analytics\res\b_mozilla\prompts and \OracleBI\web\app\res\b_mozilla\prompts. The difference is really what you are using for your web server. If using OC4J then you would use the first else use the second. To be safe and redundant you could put in both locations. Anyways the function to add is the following. This is taken straight from Mr. Sunil Ranka’s page. So lets thank him for the work as it helped tremendously.
Append the following script to the js file.
function GFPDoFilters_samvi(sViewID, tTable, bGFPReloadInline){
// RIE: calling GFPDoFilters in preview mode
// doesn’t do anything so we are going to just return
if(sViewID==ksGFPStatePath)
return;
// RIE: calling GFPDoFilters in preview mode
// doesn’t do anything so we are going to just return
if(sViewID==ksGFPStatePath)
return;
var tExpr = XUICreateElement(saw.xml.kSawxNamespace, ‘expr’);
tExpr.setAttribute(“xsi:type”, “sawx:logical”);
tExpr.setAttribute(“op”, “and”);
tExpr.setAttribute(“xsi:type”, “sawx:logical”);
tExpr.setAttribute(“op”, “and”);
for(var h=0; h<tTable.length; ++h)
{
var tPromptCells_New = tTable[h].getElementsByTagName(“TD”);
{
var tPromptCells_New = tTable[h].getElementsByTagName(“TD”);
for(var i=0; i<tPromptCells_New.length; ++i)
{
var tElement = tPromptCells_New[i];
if(tElement.getAttribute(“GFPBuilder”) != null)
{
try
{
var tFilter = eval(tElement.getAttribute(“GFPBuilder”));
if(tFilter)
{
tExpr.appendChild(tFilter);
}
}
catch(e)
{
alert(‘xxxx ‘+e);
return;
}
}
}
}
{
var tElement = tPromptCells_New[i];
if(tElement.getAttribute(“GFPBuilder”) != null)
{
try
{
var tFilter = eval(tElement.getAttribute(“GFPBuilder”));
if(tFilter)
{
tExpr.appendChild(tFilter);
}
}
catch(e)
{
alert(‘xxxx ‘+e);
return;
}
}
}
}
var tDelayedDash = document.getElementById(“sawDashboardDelayed”);
if(tExpr.childNodes.length==0 && !document.getElementById(“sawDashboardDelayed”))
return false;
else if(tExpr.childNodes.length==0)
tExpr = null;
else if(tExpr.childNodes.length==1)
tExpr=tExpr.childNodes[0];
return false;
else if(tExpr.childNodes.length==0)
tExpr = null;
else if(tExpr.childNodes.length==1)
tExpr=tExpr.childNodes[0];
if(tExpr)
{
tExpr.setAttribute(“xmlns:xsi”, “http://www.w3.org/2001/XMLSchema-instance”);
}
{
tExpr.setAttribute(“xmlns:xsi”, “http://www.w3.org/2001/XMLSchema-instance”);
}
// inline report load support on dashboard
// now we have a switch to control whether we do it inline
var tForm = GetViewForm(”, -1, bGFPReloadInline);
// now we have a switch to control whether we do it inline
var tForm = GetViewForm(”, -1, bGFPReloadInline);
if(sViewID==ksGFPStatePath)
{
var tRoot = XUIGetRootXML(“idXUIGFPPreview”);
tForm.P1.value = saw.getXmlText(saw.getFirstChildElement(tRoot));
tForm.action = saw.commandToURL(“ViewPreview”);
submitViewForm(tForm, null);
return;
}
{
var tRoot = XUIGetRootXML(“idXUIGFPPreview”);
tForm.P1.value = saw.getXmlText(saw.getFirstChildElement(tRoot));
tForm.action = saw.commandToURL(“ViewPreview”);
submitViewForm(tForm, null);
return;
}
GFPApplyFilters(tForm, tExpr, sViewID);
return false;
}
return false;
}
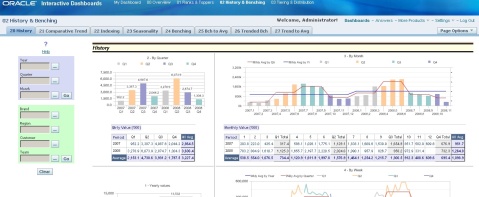
Here is the dashboard page I am going to modify:
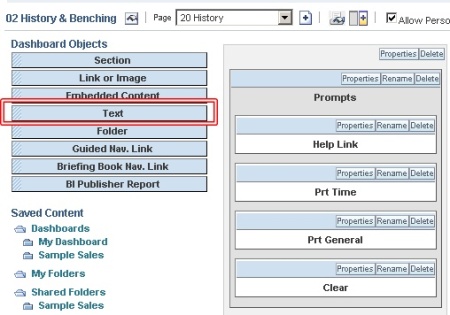
The second step is to go to your dashboard page and add a “Text” dashboard object.
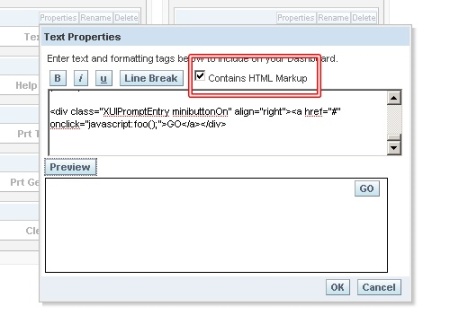
Edit the Text object by going to the properties button and pasting the code below and checking the “Contains HTML Markup” check-box.
<script> function foo(){
try{
var aElm = document.getElementsByTagName(‘table’);
var tTableArray = new Array();
var k = 0;
for(var i=0; i<aElm.length; i++){
if(aElm[i].className==’GFPBox’){
tTableArray[k] = document.getElementById(aElm[i].id);
k++;
}
}
GFPDoFilters_samvi(”, tTableArray, true);
}
catch(e)
{alert(‘XXX ‘ + e);}
}</script>
<div class=”XUIPromptEntry minibuttonOn” align=”right”><a href=”#” onclick=”javascript:foo();”>Go</a></div>
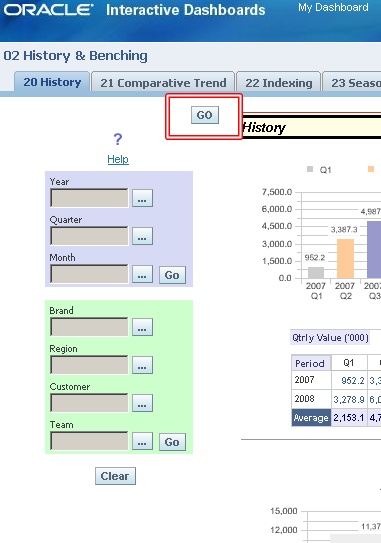
Save and that’s it. You will need to restart presentation services in order for the function added in the js file to take so I would do that first before testing the new button or you will get function not found or some error like that.
Happy Coding and let me know if you have any ?s.


