Oracle BI EE 10.1.3.3/2 – Automating Passwords Resets – nqschangepassword.exe utility

Though many of you might be aware of the simple utility called as nqschangepassword.exe, i thought this deserves a special mention here since it can serve as an automation utility to change the passwords/reset the passwords etc. You can find this utility under {OracleBI}\Server\Bin directory. As the name suggests, it helps in changing the passwords of the users in the Repository without opening the repository. The syntax for using this utility is
nqschangepassword.exe -d <data source name> -u <user name> -p <password> -n <new password> [-w <ssl passphrase> | -y]
For example,
nqschangepassword.exe -d AnalyticsWeb -u Administrator -p Administrator -n welcome1
      
This utility can be used in combination with DBMS_SCHEDULER and UTL_SMTP packages to automate the process of resetting the passwords and sending those passwords out to the end users. A very simple and very handy utility. We shall see the multitude of uses this utility can be put through in future blog entries.

Oracle BI EE 10.1.3.3/2 – Calling BI Publisher Java APIs from iBots – Storing reports in File System Using Delivers and BI Publisher Scheduler

If you had gone through my previous blog entry here i would have talked about the means of storing BI EE reports on a periodic basis using Java Scripts. But one of the main problems with this is that it would not work in an Unix environment. So, now lets look at an approach to store the BI EE report outputs using Java APIs of BI Publisher and Delivers. But as a pre-requisite you need to go through the above mentioned blog entry to understand how Java Classes are called from BI Delivers. Now in this example, we shall be using BI Publisher Delivery Manager Java APIs and will be calling these APIs from iBots. Lets look at the steps one by one.
1.   The first step to achieve this is to create the Java Class containing the relevant code. I have used JDeveloper 10.1.3.2. In order for the below code to work you need to have 3 jar files included. They are xdocore.jar, versioninfo.jar and schedulerrpccalls.jar. You can find xdocore.jar and versioninfo.jar in {OracleBI}\oc4j_bi\j2ee\home\applications\xmlpserver\xmlpserver\WEB-INF\lib. And you can find schedulerrpccalls.jar in {OracleBI}\web\javahost\lib\scheduler. Now compile the below given code and bundle it as a jar file. To know how to bundle it as a jar check the blog entry mentioned above. Remember, while deploying it as a jar you need to include the above mentioned 3 dependency jars too.
package bieesoap;
import java.io.FileInputStream;
import java.io.FileNotFoundException;
import oracle.apps.xdo.delivery.DeliveryException;
import oracle.apps.xdo.delivery.DeliveryManager;
import oracle.apps.xdo.delivery.DeliveryPropertyDefinitions;
import oracle.apps.xdo.delivery.DeliveryRequest;
import com.siebel.analytics.scheduler.javahostrpccalls.SchedulerJavaExtension;
import com.siebel.analytics.scheduler.javahostrpccalls.SchedulerJobException;
import com.siebel.analytics.scheduler.javahostrpccalls.SchedulerJobInfo;
import java.io.File;
import oracle.apps.xdo.delivery.local.LocalPropertyDefinitions;
public class LocalCopy implements SchedulerJavaExtension{
public LocalCopy() {
}
public void run(SchedulerJobInfo jobInfo) throws SchedulerJobException {
try
{
FileInputStream fileInputStr = new FileInputStream(jobInfo.getResultSetFile());
DeliveryManager delMan = new DeliveryManager();
DeliveryRequest delReq = delMan.createRequest(DeliveryManager.TYPE_LOCAL);
delReq.addProperty(LocalPropertyDefinitions.LOCAL_DESTINATION, “D:\\BIPAPI\\Output.pdf”);
delReq.setDocument(fileInputStr);
delReq.submit();
delReq.close();
}
catch(Exception ex)
{
throw new SchedulerJobException(1, 1, ex.getMessage());
}
}
public void cancel() {
}
}
This is how the above code works. When we include a Java Class from an ibot, the ibot uses the Java Host service to make a remote procedure call to the Run method of the class specified. jobInfo object would get the output of the ibot (say a PDF file) and will pass it on to the Delivery manager API of BI Publisher. The delivery manager API then makes a call to the file system to store the PDF file to a local directory.
      
      
2.   Copy the deployed jar file to your java host lib path(check the above blog entry to know where to specify this path).
3.   Now create an ibot and include any report content. Ensure that you are making the output type to be of PDF since we are making the above output file name to be output.pdf. Go to the Advanced properties and add a Java Class as shown below.


This can be very useful for advanced integration scenarios. You can even call the BI Publisher FOProcessor API to actually create the BIP reports and can use Delivers to deliver them. There are lots of different functionalities where this can be very helpful.

Oracle BI EE 10.1.3.3/2 – Adding Watermarks to Delivered PDF Documents – Using PDF Merger API of BI Publisher

In the previous blog entry we have seen how to go about delivering documents to a local file system using the Delivery Manager API of BI Publisher. Along the same lines, lets look at another very interesting feature which is the PDF WaterMarking feature. Many a time you might want to watermark your documents (especially PDFs) when you send out to multiple users via iBots. Watermarking is not available out of the box for BI EE. This is where BI Publisher can come to our rescue ( i always wonder how both BI EE and BI Publisher complement each other some times). In order to do watermarking, we need to use the PDF Merge API of BI Publisher and then call it from ibots. Lets look at the list of steps below. In the example below, i shall be adding an Oracle Logo as the watermark to a delivered BI EE PDF document.
1.   The first thing that you need is the following sample java code which combines your PDF output with a local image. This has to be included as part of the scheduler’s run method since the remote procedure call will only call this run method.
package bieesoap;
import java.io.FileInputStream;
import oracle.apps.xdo.common.pdf.util.PDFDocMerger;
import com.siebel.analytics.scheduler.javahostrpccalls.SchedulerJavaExtension;
import com.siebel.analytics.scheduler.javahostrpccalls.SchedulerJobException;
import com.siebel.analytics.scheduler.javahostrpccalls.SchedulerJobInfo;
import java.io.File;
import java.io.FileOutputStream;
import oracle.apps.xdo.delivery.DeliveryManager;
import oracle.apps.xdo.delivery.DeliveryRequest;
import oracle.apps.xdo.delivery.local.LocalPropertyDefinitions;
public class PDFMerge implements SchedulerJavaExtension{
public PDFMerge() {
}
public void run(SchedulerJobInfo jobInfo) throws SchedulerJobException {
try
{
FileInputStream[] inputStreams = new FileInputStream[1];
inputStreams[0] = new FileInputStream(jobInfo.getResultSetFile());
FileOutputStream outputStream = new FileOutputStream(“D:\\BIPAPI\\Output4.pdf”);
PDFDocMerger docMerger = new PDFDocMerger(inputStreams,outputStream);
FileInputStream imagePath = new FileInputStream(“D:\\BIPAPI\\oraclelogo_small.gif”);
float[] rct = {300f, 500f, -1f, -1f};
docMerger.setImageWatermark(imagePath, rct);
docMerger.mergePDFDocs();
docMerger = null;
imagePath.close();
outputStream.close();
}
catch(Exception ex)
{
throw new SchedulerJobException(1, 1, ex.getMessage());
}
}
public void cancel() {
}
}
As you see above, what this does is, it calls the PDFDocMerger class. This class accepts 2 inputs, a stream of pdf inputs and a pdf output. It also accepts the setImageWatermark property which will set the watermark to the pointed image.
2.   Compile this class and bundle this as a jar along with the dependent jars (schedulerrpccalls.jar, versioninfo.jar and xdocore.jar). For more details on how to do this refer my blog entry here and here
3.   Now go to delivers and create an ibot. This ibot should contain a report exported in the PDF format. This PDF of the report will be watermarked with Oracle Logo.
      
      
4.   Once this is done, now go to your Advanced tab and call the class that we created above.
      
5.   Now save this ibot. As soon as this is done, you would notice that a new file called output4.pdf under D:\\BIPAPI would have been created and this would contain both the report and the watermark image.
      
Just add delivery manager API code to the above class and now you would be in a position to send the watermarked PDF to other users.This feature can be extended to a lot of other features like combining multiple reports into a single PDF etc.

Oracle BI EE 10.1.3.3/2 – Conditional Filters – Using Case statements in Filters

I had this question come via email twice last week and hence i thought i would blog about it today. Though this is very simple, i thought i would blog about this to show that one can use advances sql clauses in filter expressions. In order to understand, lets first start with a simple report shown below.
      
Now, our aim is to apply filter only for the REGION_NAME = ‘Asia’. So, basically we want a report wherein only for Asia we do not want to display the sales for the year 2003. But for other regions we need the year 2003. In order to do this, all we need to do is to create a filter on REGION_NAME and convert it into SQL.
      
Once this is done, just enter the below SQL
CASE WHEN GEOGRAPHY.REGION_NAME = ‘Asia’ THEN TIMES.CALENDAR_YEAR_NAME ELSE ‘Dummy’ END != ’2003′
      
What this basically does is, it evaluates the CASE statement first. If REGION_NAME = ‘Asia’ then the filter CALENDAR_YEAR_NAME != ’2003′ is applied else the filter ‘Dummy != ’2003′ will be applied (in place of Dummy you can have anything that is not equal to 2003). One you have this filter now you would have a report with year=2003 filter applied only for asia Region.
      
As i said earlier, this is pretty simple and can be considered trivial even. But again, this is just to show you the fact that one can use advanced filter clauses

Oracle BI EE 10.1.3.3/2 – Combining Multiple Excel Report Outputs(Workbooks) to a Single Excel Report – Using BI Delivers, BI Publisher APIs and VB Scripts

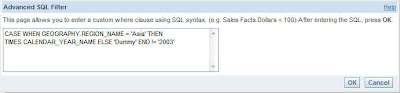
I received this question a couple of days back. The question was “Is there any way to combine say 2 or more number of Report Outputs into a single Excel File automatically, instead of manual exports and copy paste?”. This question keeps coming a lot many times but there is no out of the box solution for this. Lets look at one possible approach today. Remember that this is not an easy way and would involve a call to a lot of components. I am blogging about it just to demonstrate the extensibility of BI EE. In order to achieve this we shall be using 2 reports. Our aim is to use BI Delivers and BI Publisher APIs to export both the reports in Excel 2000 format to a folder. And then use another ibot to call a VBScript to combine all the exported reports to a single excel file. All the ibots will be called one after the other.
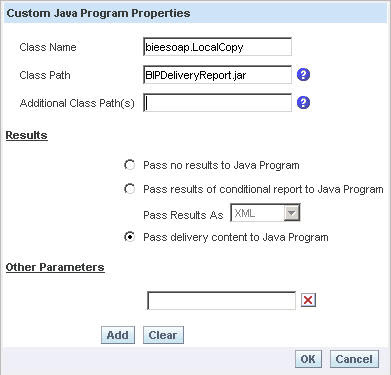
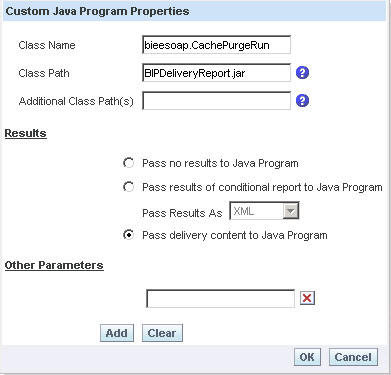
1.   So, lets start with the Java Code to export the reports in the form of Excel 2000. This Java Code has to be called from an ibot. For more details on how to go about calling Java Classes from ibots check my blog entry here. The code is given below
package bieesoap;
import java.io.FileInputStream;
import java.io.FileNotFoundException;
import oracle.apps.xdo.delivery.DeliveryException;
import oracle.apps.xdo.delivery.DeliveryManager;
import oracle.apps.xdo.delivery.DeliveryPropertyDefinitions;
import oracle.apps.xdo.delivery.DeliveryRequest;
import com.siebel.analytics.scheduler.javahostrpccalls.SchedulerJavaExtension;
import com.siebel.analytics.scheduler.javahostrpccalls.SchedulerJobException;
import com.siebel.analytics.scheduler.javahostrpccalls.SchedulerJobInfo;
import java.io.File;
import oracle.apps.xdo.delivery.local.LocalPropertyDefinitions;
public class ExcelOutput implements SchedulerJavaExtension{
public ExcelOutput() {
}
public void run(SchedulerJobInfo jobInfo) throws SchedulerJobException {
try
{
String OutputFileName;
OutputFileName = “D:\\Work\\Report” + jobInfo.jobID() + jobInfo.instanceID() + “.xls”;
FileInputStream fis = new FileInputStream(jobInfo.getResultSetFile());
DeliveryManager dm = new DeliveryManager();
DeliveryRequest req = dm.createRequest(DeliveryManager.TYPE_LOCAL);
req.addProperty(LocalPropertyDefinitions.LOCAL_DESTINATION, OutputFileName);
req.setDocument(fis);
req.submit();
req.close();
}
catch(Exception ex)
{
throw new SchedulerJobException(1, 1, ex.getMessage());
}
}
public void cancel() {
}
}
So what this basically does is, it accepts the output of an ibot and stores it in D:\Work with a dynamic file name based on the Job ID and the InstanceID (Something like this Report240.xls etc).
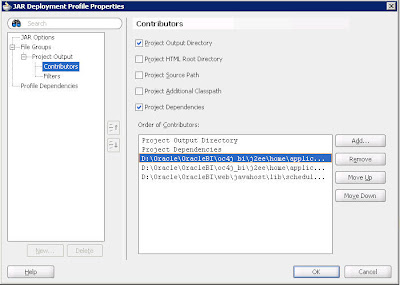
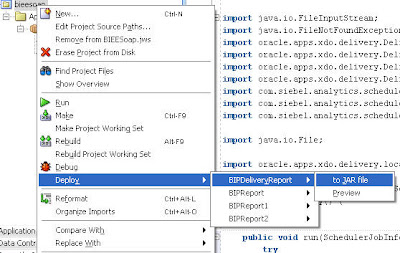
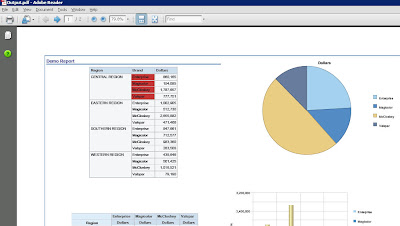
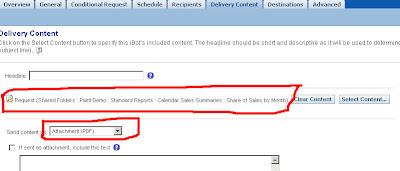
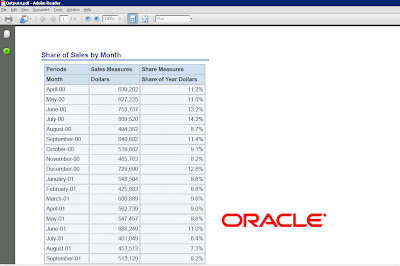
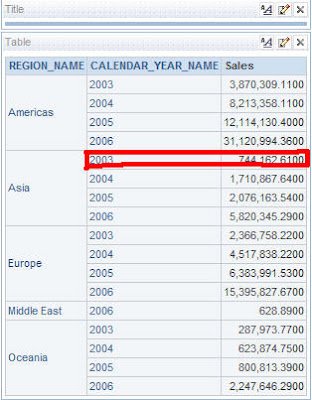
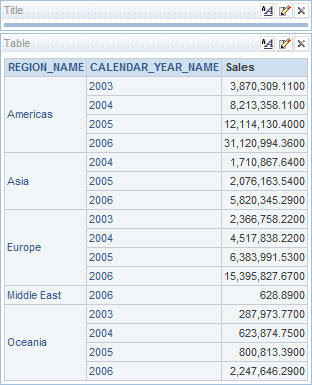
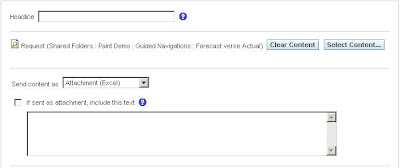
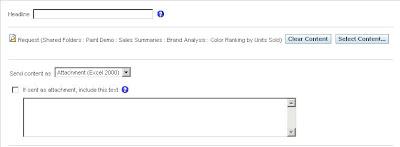
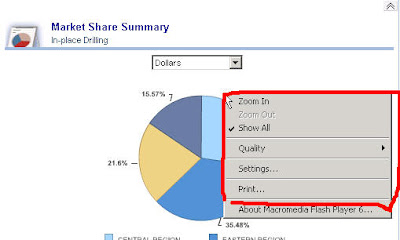
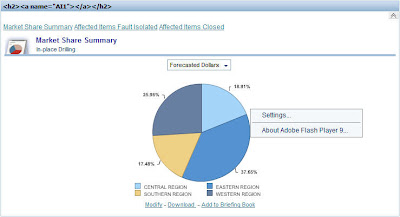
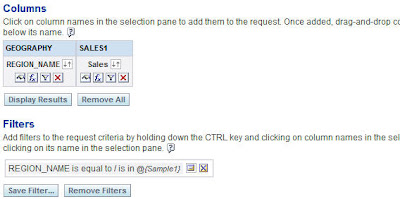
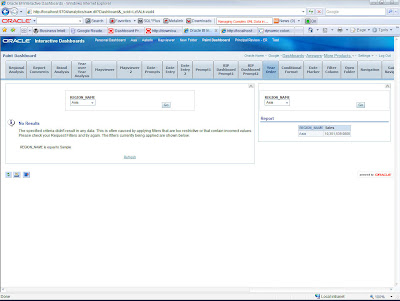
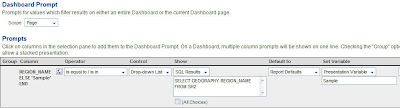
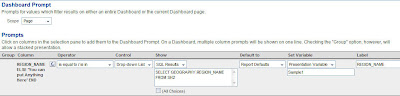
2.   Now the next step is to create 2 ibots and each of them should be made to export 2 different files in Excel 2000 format. Ensure that both the ibots call the above java code using a bundled Jar. I have 2 different reports as shown below
      
      
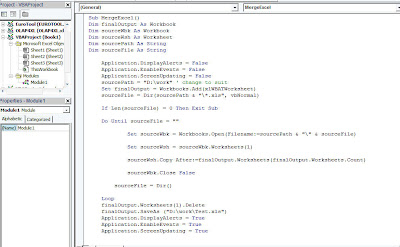
3.   Just save the above 2 ibots and make each of them to call the above Java Code. Once this is done, lets move away from BI Delivers and look at the VB Scripting part which would achieve combining of multiple excel files into one excel file. In order to do this, we shall start with a simple VBA or macro script given below.
Sub MergeExcel()
Dim finalOutput As Workbook
Dim sourceWbk As Workbook
Dim sourceWsh As Worksheet
Dim sourcePath As String
Dim sourceFile As String
Application.DisplayAlerts = False
Application.EnableEvents = False
Application.ScreenUpdating = False
sourcePath = “D:\work” ‘ change to suit
Set finalOutput = Workbooks.Add(xlWBATWorksheet)
sourceFile = Dir(sourcePath & “\*.xls”, vbNormal)
If Len(sourceFile) = 0 Then Exit Sub
Do Until sourceFile = “”
Set sourceWbk = Workbooks.Open(Filename:=sourcePath & “\” & sourceFile)
Set sourceWsh = sourceWbk.Worksheets(1)
sourceWsh.Copy After:=finalOutput.Worksheets(finalOutput.Worksheets.Count)
sourceWbk.Close False
sourceFile = Dir()
Loop
finalOutput.Worksheets(1).Delete
finalOutput.SaveAs (“D:\work\Test.xls”)
Application.DisplayAlerts = True
Application.EnableEvents = True
Application.ScreenUpdating = True
End Sub
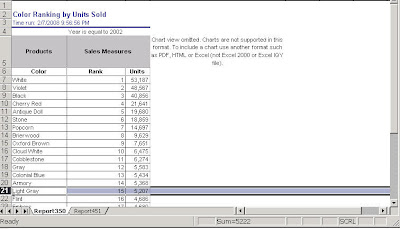
So, what this basically does is it checks the directory D:\Work and combines all the excel files it finds in that directory into a single file Test.xls.
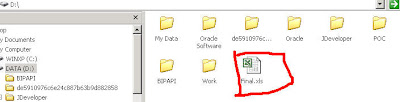
4.   Remember the above is a VBA Script. BI Delivers can only call VB Scripts. Now, in order to call VBA Script, what we shall do is to create a dummy excel file called Final.xls in D:\(ensure that this excel file is not in the same directory as the above export files) and we shall create a macro using the above code in this Excel file. Our aim is to make the macro to run as soon as the Excel file is opened.


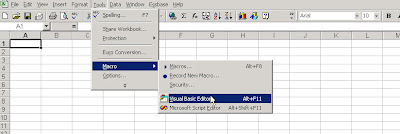
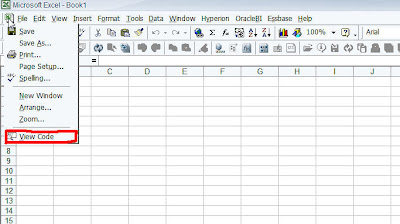
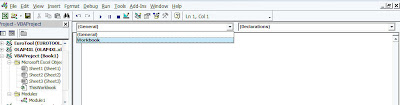
Now, in order to make this macro to run as soon as the Excel is opened, right on the Excel icon just above file menu and click on view code. Go to the Workbook and add the below code.
      
      
Private Sub Workbook_Open()
Run “MergeExcel”
End Sub
Then just save this file. Also, ensure that you have the security of this Excel file set to Low. Now open a text editor and add the below VB Script which will open the Excel file.
Dim app
Set app = createobject(“Excel.Application”)
app.visible = false
app.Workbooks.Open(“D:\Final.xls”)
app.Quit
Set app = Nothing
Save this file in {OracleBI}\server\Scripts\common folder.
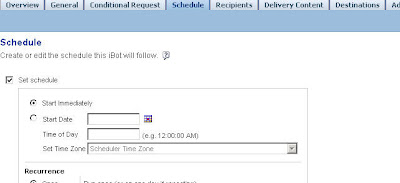
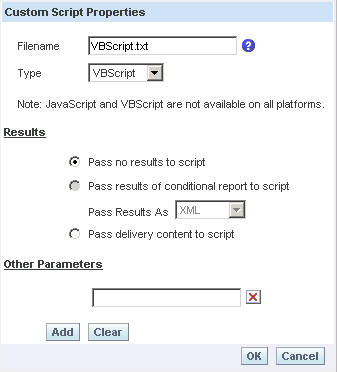
5. Now create a third ibot which would just call the above VBScript.
      
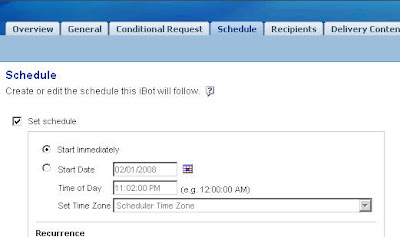
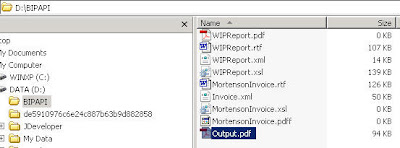
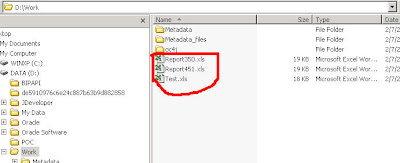
6.   Now schedule all the 3 ibots to execute one after the other (you can either use ibot chains or just schedule them to execute one after the other). Its better to use ibot chains since they are synchronous in nature. Now you should see 3 excel reports in the D:\Work directory, 2 being the actual reports and the third being the Test.xls which would be a combination of the above 2.
      
      
But just remember the above would work only in windows since VBScript would not work in a non-windows environment

Oracle BI EE 10.1.3.3/2 – Disabling Right Click Options – Flash Charts

Another pretty interesting question came up in the forums today. The question was “How do we go about removing the various Zoom Options that we get in the Charts in a Dashboard”. If you are not sure what i mean, check the screenshot below,
      
Our aim is to remove the zoom options above. In order to do this, we need to follow the following steps. Remember, the steps are different for IE and Mozilla. Lets look at IE first and then to Mozilla. For an IE browser, following are the list of steps,
1.   Go to {OracleBI}\web\app\res\b_mozilla and open the file common.js in a Text editor. Search for ieActiveXFix. You would basically find an IE fix for displaying flash charts in an IE browser. You would find the following statement in this fix.
var str = ‘<object classid=”‘+classid+’” width=”‘+width+’” height=”‘+height+’” id=”‘+id+’” codebase=”‘+codebase+’”><param name=”wmode” value=”transparent”><param name=”movie” value=”‘+tNewMovie+’”></object>’;
Now change the above to the one shown below,
var str = ‘<object classid=”‘+classid+’” width=”‘+width+’” height=”‘+height+’” id=”‘+id+’” codebase=”‘+codebase+’”><param name=”wmode” value=”transparent”><param name=”menu” value=”false”><param name=”movie” value=”‘+tNewMovie+’”></object>’;
So, basically we are adding the below tag to suppress the Zoom option menu.
<param name=”menu” value=”false”>
2.   Now copy the above modified file to {OracleBI}\oc4j_bi\j2ee\home\applications\analytics\analytics\res\b_mozilla (You should replace the existing common.js with the above modified one).
3.   Now restart presentation services and now you note that the right click on charts would not have zoom option.
      
Now, for Mozilla, the steps are much easier.
1.   Go to {OracleBI}\web\msgdb\messages and copy the file charttemplates.xml to {OracleBIData}\web\msgdb\customMessages(if you dont have this directory, create one).
2.   Open the copied file in a text editor. And search for the below XML message.
<WebMessage name=”kuiChartViewMozFlashOBJECTTag”><!– @1 : width –><!– @2 : height –><!– @3 : name –><!– @4 : src –><!– @5 : pluginspage –><HTML> 
<embed type=”application/x-shockwave-flash” pluginspage=”@5″ name=”@3″ src=”@4″ width=”@1″ height=”@2″ wmode=”transparent”/></HTML></WebMessage>
Replace the above XML Message with
<WebMessage name=”kuiChartViewMozFlashOBJECTTag”><!– @1 : width –><!– @2 : height –><!– @3 : name –><!– @4 : src –><!– @5 : pluginspage –><HTML> 
<embed type=”application/x-shockwave-flash” menu=’false’ pluginspage=”@5″ name=”@3″ src=”@4″ width=”@1″ height=”@2″ wmode=”transparent”/></HTML></WebMessage>
Basically we are adding menu=’false’ to the XML message which will remove the Zoom options.
3.   Save the file and restart presentation services. You would now notice that the context menu would not have the zoom options anymore for Mozilla browser.
      

Oracle BI EE 10.1.3.3/2 – Scheduling Cache Purging – Phase 2 – Using Java and Delivers

If you had seen my previous blog entry here, i would have shown you a procedure to purge the cache on a periodic basis using Java Script. I was asked today about the possibility of doing the same using Java. So, lets look today how to go about scheduling cache purges using Java and Delivers.
1.   The 1st step to achieve this is to create a SQL.txt file containing the actual ODBC call.
{call SAPurgeAllCache()};
      
In my case, i have created this in D:\ drive.
2.   Now, create a batch file which would make the following call to NQCmd.exe. You can store the batch file anywhere. The following would be the contents of the batch file.
D:\Oracle\OracleBI\server\Bin\nqcmd.exe -d AnalyticsWeb -u Administrator -p Administrator -s D:\SQL.txt -o D:\Output.txt
3.   Open JDeveloper and compile the following java program.
package bieesoap;
import com.siebel.analytics.scheduler.javahostrpccalls.SchedulerJavaExtension;
import com.siebel.analytics.scheduler.javahostrpccalls.SchedulerJobException;
import com.siebel.analytics.scheduler.javahostrpccalls.SchedulerJobInfo;
public class CachePurgeRun implements SchedulerJavaExtension {
public CachePurgeRun() {
}
public void run(SchedulerJobInfo jobInfo) throws SchedulerJobException
{
try
{
Process p = null;
//String[] cmdAry = {nqCmd,” -d “, dsn, ” -u “, user, ” -p “, pswd, ” -s “, tempInFileName, ” -o “, tempOutFileName};
String[] cmdAry = {“D:\\CachePurge.bat”};
p = Runtime.getRuntime().exec(cmdAry);
}
catch(Exception ex)
{
throw new SchedulerJobException(1, 1, ex.getMessage());
}
}
public void cancel() {
}
}
As you see, what this above code does is, it makes a call to the NQCMD.exe file and passes the SQL.txt file as its argument. Once this is executed the output would be stored in the output.txt file.
4.   Now, bundle the above java code into a jar file (for details on how to do this check my blog entry here
5.   Once this is done, just go to delivers and call this java class from the Advanced tab. You can schedule this periodically.
      
6.   Just keep checking the output.txt to know whether the cache purge has completed successfully.
      

Oracle BI EE 10.1.3.3/2 – Scoping of Dashboard Prompts and Presentation Variables – Reducing Scope for a specific Report

Today we shall see an example of how to go about reducing the scope of Dashboard prompts to only specific reports. As you would already know, Dashboard Prompts have 2 types of scoping. One is Page and the other is Dashboard.
      
So, basically you cannot have multiple prompts for the same dashboard column in the same page. Lets look at an approach today to see how we can have dashboard prompts of reduced scope. Before doing that, lets try to understand the scoping of Dashboard prompts. Lets first start with a creating 2 dashboard prompts each pointing to the same REGION_NAME column. Each of the dashboard prompts would set a presentation variable. In my case, i have chose Sample andSample1 as the presentation variable names. Both the prompts would have a page scope.
      
      
Now, lets create 2 reports each having the same columns (REGION_NAME and SALES). For one report, let’s create a filter on REGION_NAME to be equal to that of the presentation variableSample and the for the other report, create a filter of REGION_NAME to be equal to that of the presentation variable Sample1.
      
      
Now, lets pull both the dashboard prompts and the reports into a single dashboard page. As you would see, when you choose any value for one of the prompts only the second report output changes since the prompt would still call the latest presentation variable Sample1 instead of Sample. This happens because of the page scope of the prompts.
      
Now, how do we go about reducing the scope of the prompts to only one report. In order to do this, edit both the prompts. In formula section, enter
CASE WHEN 1=0 THEN GEOGRAPHY.REGION_NAME ELSE ‘You can put Anything Here’ END
And convert the Results to SQL Results and enter the below SQL.
SELECT GEOGRAPHY.REGION_NAME FROM SH2
      
      
Now, if you go back to the dashboard page, you would notice that both the presentation variables would be set and both the reports would have proper filters applied.
      
Though we have seen this technique before, we have not applied it in this context earlier. This can be pretty useful in a lot of situations when you do not need multi-select prompts.