Another interesting question came up in the forums today for which there is no proper documentation or rather incomplete documentation. The question was how do we Externalize Presentation Layer i.e enable translation of Presentation Layer depending on the User Logged in Language. If you had gone through my previous blog entry here, you would have noticed that this option is primarily only for sections like Dashboard Names, Report Names etc. But this does not do the translation for the Subject Areas and their associated tables/columns. In order to do this we would have to follow another procedure called Externalizing Presentation Layer. Lets look at the steps one by one here today.
1. Open Administration Console and right click on the Presentation Subject Area that you would like to Externalize. You would see 2 options there to externalize names and descriptions. For now lets externalize Names alone. So, click on Externalize Display Names.
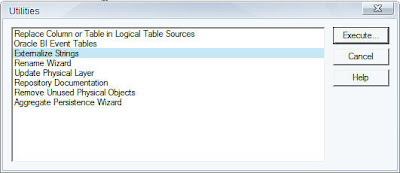
2. Once this is done go to Tools->Utilties and Click on Execute to Externalize Strings.
After this, you would see a screen that would look like this. What this basically shows you is the Names of the presentation catalogs. Save this as a csv file.
3. Open up this Excel file and lets understand the structure of the csv. The first column represents Actual Names prefixed by their types of the Presentation Layer. The second column represents a list of Session variables prefixed by CN_. Remember that by default CN_ would be prefixed. The 3rd column represents the actual translation. Lets modify this csv and lets add one more column called language. This language would have values of Languages supported by OBI EE(abbreviations).
As you see above we have done translation of individual presentation layer table names and columns to languages. English and french.
4. The next step is to load this CSV file into a database table.
In our case, the name of the database table is external which contains the data of the CSV.
5. Now lets import this table into the Physical layer..
6. The first step after importing this table is to create an initialization block to initialize the LOCALE variable based on the language selected by the user in Dashboard login. To do this create a session initialization block having the data source from a database. The database sql would have a sql like this
SELECT ‘VALUEOF(NQ_SESSION.WEBLANGUAGE)’ FROM DUAL
Also assign the target to the system session variable LOCALE. What this basically does is, whenever a user logs into dashboards the WEBLANGUAGE session variable is set. Then this variable sets the LOCALE variable using the initialization block.
7. The next step is to create another session initialization block which would basically create a set of session variables using a database specific sql. The sql would look like this
select SESSION_VARIABLE, TRANSLATION from external where LANGUAGE = ‘VALUEOF(NQ_SESSION.LOCALE)’
As you see above, this block will create all the variables whose Language match the user’s login language. Set the target of the init block to Row Wise initialization and then select the previously created init block in the execution precedence. i.e we want the 1st block created earlier to execute first.
8. Then login to Dashboards using French as the language.
As you see above all the translations corresponding to the french language on presentation layer has happened based on the user login. The documentation for this is not extensive though it is a bit straightforward once you know how to do it.


