One of the very good features of BI EE is its ability to enable proxy functionality for all/some users. For example, as an Administrator user, one can proxy as another user and can find out what kind of dashboard other users have. One other good example is (given in the documentation) a manager user allowing one of his direct reportees to create reports for him. Though the setup for this functionality is straight forward, i thought i would blog about it since the functionality is commonly desired.(I believe
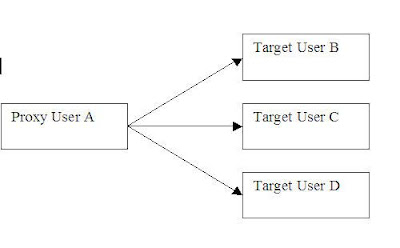
Borkur had blogged about it before. Not sure where it is now. If anyone has the link, just leave a comment with the link and i would update the link here.) We shall be using 2 terms here. They are ProxyUser and TargetUser. You can understand what these 2 users mean from the below diagram
Basically ProxyUser is the user who would be proxying as other users. I.e User A can proxy as user B, C and D(targetUsers)
Enabling this functionality is a four step process.
1. Let BI Server and Presentation Server know about the list of target users.
2. Let BI Server and Presentation Server know about the list of proxy users.
3. Let BI Server and Presentation Server know about the relation between the target and proxy users (who will proxy in as whom)
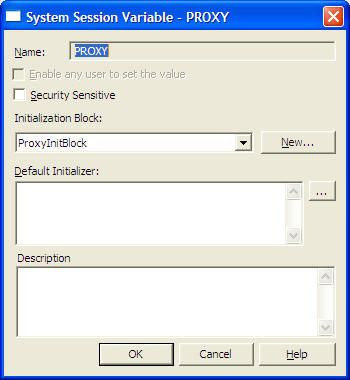
4. Create an InitBlock and a system session variable called PROXY to allow the proxy user to authorize.
The first 3 steps are achieved by adding a set of tags to the instanceconfig.xml. Lets take a simple example. There are 2 users Administrator and paint. Our aim is to set up a proxy funtionality for the Administrator user so that he can proxy in as the paint user. In order to do that lets start with creating a simple table with the below structure.
3 | PROXYUSER VARCHAR2(100), |
4 | TARGETUSER VARCHAR2(100), |
PROXYUSER – Stores the list of PROXYUSERS needed within BI EE. In our case, this column should have the Administrator user as one of the values.
TARGETUSER – Stores the list of TARGETUSERS needed within BI EE. In our case, this column should have the paint user as one of the values.
PROXYLEVEL – This can take 2 values — full or restricted. If full access is provided, then the proxyuser would have edit/read privileges of the target user (provided the proxyuser himself has those privileges). If restricted access is provided, then the proxyuser would only have read privileges (provided the proxy user himself has those privileges).
Now, lets insert the users as desired for our example into the table
1 | INSERT INTO PROXYTABLE values('Administrator','paint','restricted'); |
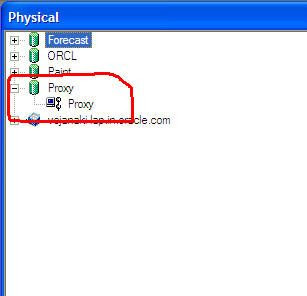
Once this is done, create a seperate connection pool connecting to the database containing the above table.
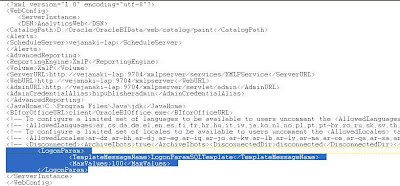
Now, lets start with the first 3 steps mentioned above i.e to let the BI Server and Presentation Server know about the list of target, proxy users and their corresponding relationships. In order to do this, we need to first add a set of tags to the instanceconfig.xml that would let the presentation server know about an XML template(which would contain the queries to get the list of target, proxy users). So, add the tags given below to your instanceconfig.xml (between the ServerInstance tags)
2 | <TemplateMessageName>LogonParamSQLTemplate</TemplateMessageName> |
3 | <MaxValues>100</MaxValues> |
In the above XML, TemplateMessageName tag value(LogonParamSQLTemplate) would be the Template name which we would be creating.
Go to {OracleBIDate}\web\msgdb\customMessages (if you do not have this folder, create one) and create the below XML file in this folder (you can give any name to the XML file)
01 | <?xml version="1.0" encoding="utf-8" ?> |
02 | <WebMessageTables xmlns:sawm="com.siebel.analytics.web.messageSystem"> |
03 | <WebMessageTable system="SecurityTemplates" table="Messages"> |
04 | <WebMessage name="LogonParamSQLTemplate"> |
06 | <logonParam name="RUNAS"> |
07 | <getValues>EXECUTE PHYSICAL CONNECTION POOL Proxy.Proxy |
08 | select TARGETUSER from PROXYTABLE where PROXYUSER='@{USERID}'</getValues> |
09 | <verifyValue> EXECUTE PHYSICAL CONNECTION POOL Proxy.Proxy |
10 | select TARGETUSER from PROXYTABLE where PROXYUSER='@{USERID}' and TARGETUSER='@{VALUE}'</verifyValue> |
11 | <getDelegateUsers>EXECUTE PHYSICAL CONNECTION POOL Proxy.Proxy |
12 | select PROXYUSER, PROXYLEVEL from PROXYTABLE where TARGETUSER='@{USERID}' |
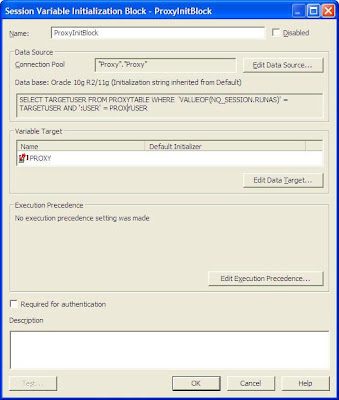
Once this is done, restart the presentation server. Now, the next step is to initialize a system session variable PROXY from an init block. This will help in authenticating the proxy user as the target user.
In the InitBlock use this SQL.
1 | SELECT TARGETUSER FROM PROXYTABLE WHERE 'VALUEOF(NQ_SESSION.RUNAS)' = TARGETUSER AND':USER' = PROXYUSER |
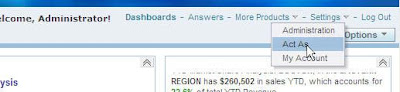
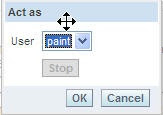
Do not worry about RUNAS session variable. This RUNAS session variable would be populated when you click on the target user. And based on what you have clicked, the PROXY user value would be populated. Now, if you log on as Administrator and click on Settings -> Act as, you would get the paint user.
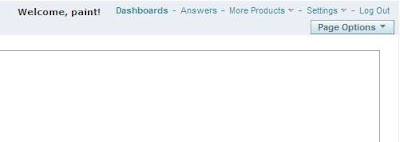
Now, the Administrator user should be able to proxy as the Paint user
If needed, you can populate another session variable PROXYLEVEL to vary the access levels of the proxying user. But this should get you started.